To find the right chip for your application, first we need to know what ECU type is fitted and what software variant it is using.
The simplest method is taking a look at your ECU,
and sending us a photograph, or a copy of the information on the ECU case.
We can use this information to cross reference through our database and find the correct software to create
a base. This base file is then modified and a replacement is created with your original information and our
tuned maps.
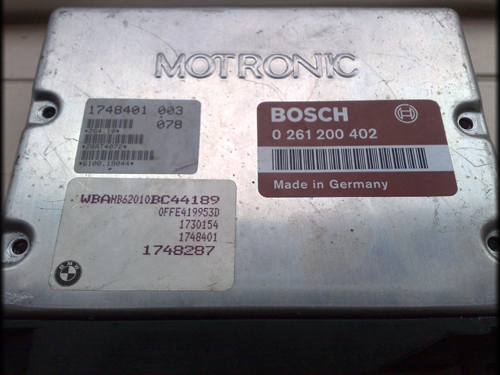
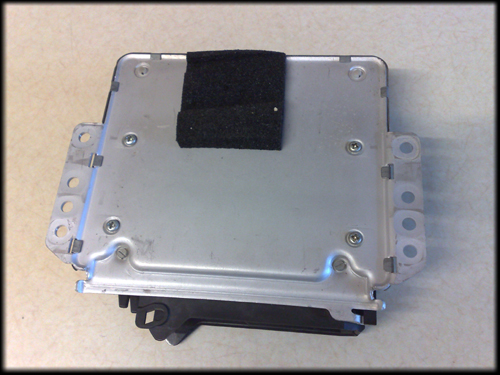
Above is a picture of a typical Bosch ECU. On this example, the ECU type is 0261 200 402.
The BMW sticker bottom left shows the chassis number, and part numbers, and the barcoded sticker shows
the programmed BMW part number. The 4 retaining screws have been removed in this picture. For reference, they are Torx T20.
The screws on the bottom of the unit do not need to be removed.
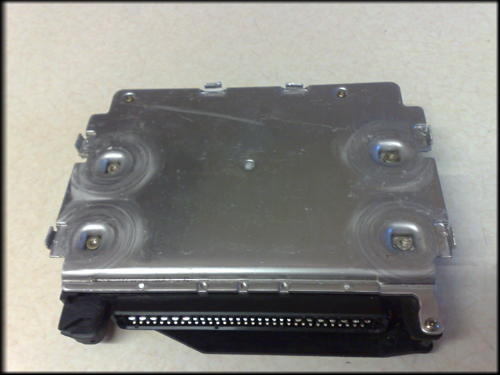
Gently bend back all the 6 aluminium tabs to release the cover. Aluminium is prone to fatiguing
from movement, so some tabs may break. The screws on the top side are able to hold the cover in place sufficiently
and the tabs do not provide any waterproofing. You may tape along the edges to help seal the unit, but only if
it is perfectly dry. Trapping moisture inside may lead to corrosion of the internal components.
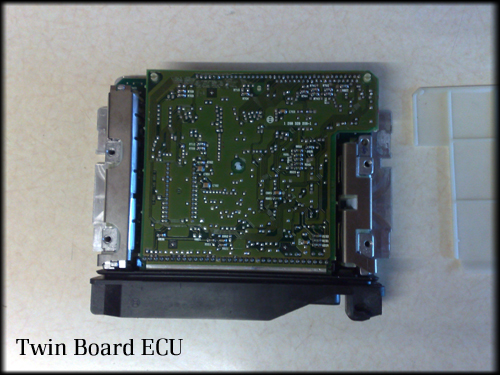
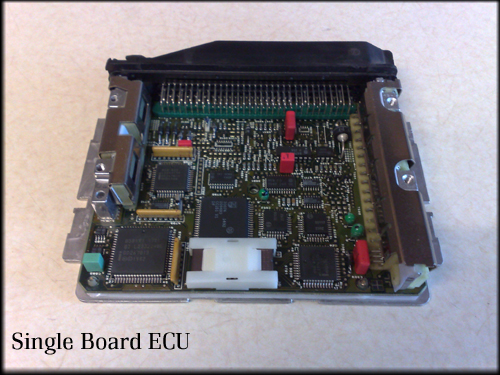
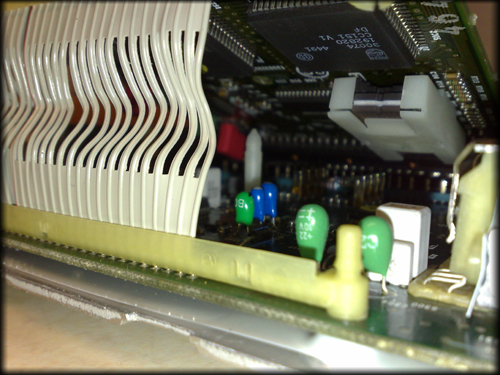
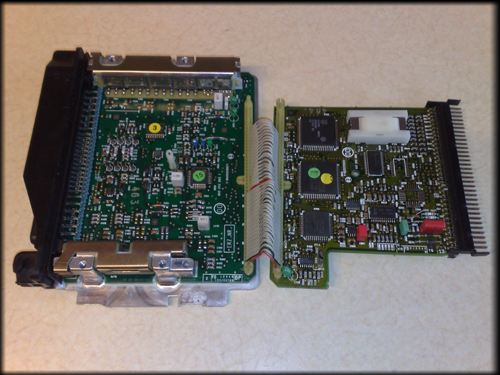
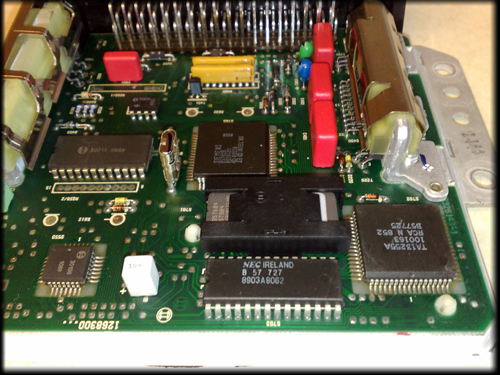
The images above show the single and twin board ECU types. The popular 413 ecu is a Single Board,
and the 402 is a Twin Board type. The Twin board here has the protective plastic anti-short panel removed.
On the second Single Board ECU, you can see the chip mounted in it socket, under
a white protective anti-shake clip.
Twin Board Fitting
The Twin Board ECU is slightly trickier to gain access to. There are 2 ways of replacing the chip,
the first is with the board lifted up and is the recommended way although working space is limited.
The second way is to release the top board but this can require a lot of pulling and maneuvering of
the top board to release it. Undue stresses on the board can cause cracks or damage, or components
might be bent when trying to separate the sections. For Single Board fitting, you can jump some of these steps now.
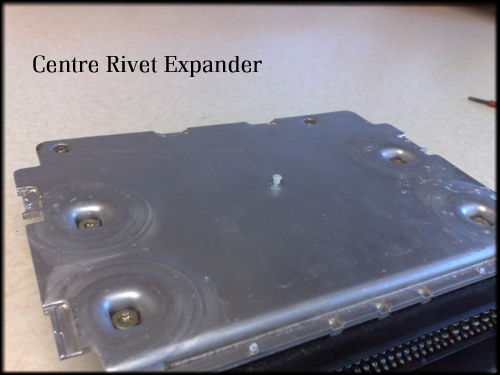
First, you'll need to lift the
centre rivet. This small spike passes though to the expanding
rivet in the middle of the second board. Gently lift this around the edges, and you should be able then to pull
it up by approx 5mm which will allow the
expanding rivet on the top board to be pinched, and release the board.
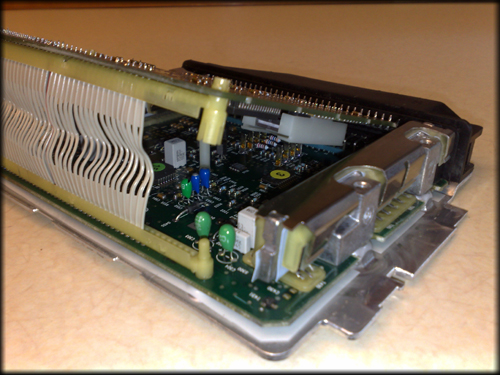
Above shows the
Twin Board ECU with the top board lifted. Again, you can now see the chip
inside it's carrier. To lift this section, pinch the expanding rivet in the middle, and then you can pull
the "
stand offs" apart. These are the legs you will see on each side of the
ribbon connector.
The ribbon connector will try to hold the boards together, so reach in behind them and pull the
crease towards you and it'll open easier.
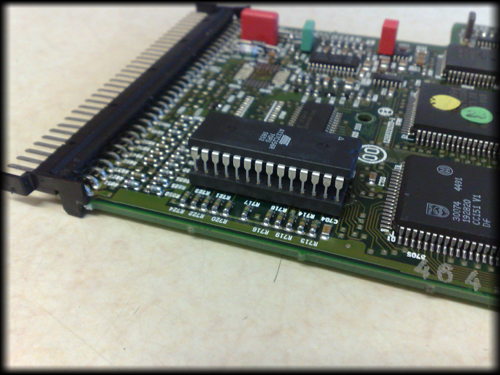
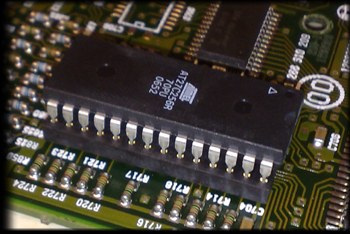
Above is a picture of the chip and socket. You can just see the
notch in the chip and socket which
tells you the correct orientation to fit the chip.
Always keep the notch on the chip at the same side as the socket.
At this point, you can carefully unclip the white anti-vibration clip, and lift out the old Eprom.
If you want to separate the two boards, follow the instructions below.
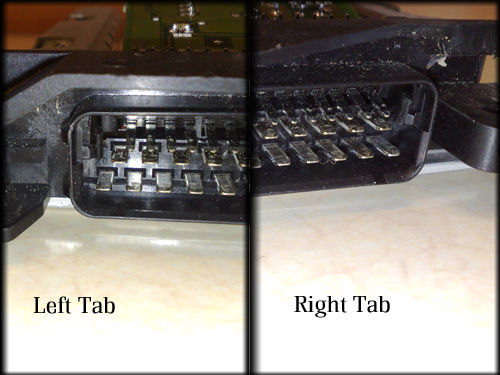
Both board tabs need to be pressed, and this releases the top board. You may find you'll need to lever
inside of the main connector socket to unhook the top board section from the main connector surround.
If you are successful, the top board will then be able to pull free and fold out.
With the top board opened out, again, we can see the chip mounted in its clip and socket.
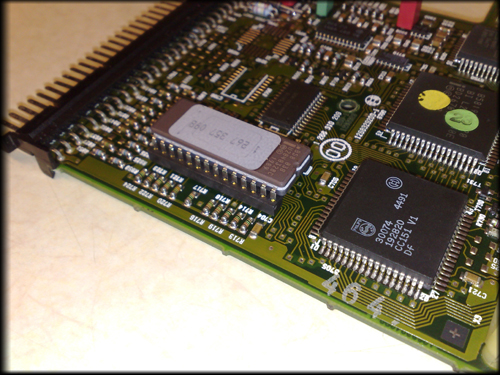
With the clip removed, you can see the original chip. The Silver sticker both shows the original software version;
which you may be required to obtain if we can't track down your original software version from the part numbers, and
underneath this sticker is a
Quartz Window. This allowed the chip to be erased with high powered UV tubes.
The UV light would clear all the information off the chip, and could cause corruption if the chip was
exposed to long periods of UV light. In normal sunlight, this would take a number of days, but it still needs to
remain covered. The new
eTune chip
comes inside a plastic package which shields the internal silicon chip from UV light.
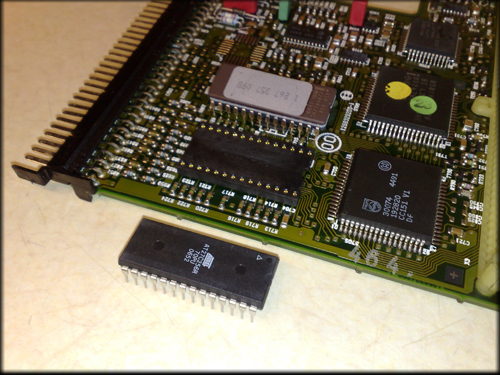
Remove the old chip by gently levering on each side. The aim is to lift the chip up equally
so it comes out straight. If it is lifted more on one end, there is a chance the far pins may bend.
The pins can be straightened if they have minor damage, but it greatly increases the risk of a leg breaking off.
Under most circumstances, we can provide recovery for damaged chips, if for example you need to clone
an existing EWS equipped ECU, or wish to return your ECU to standard.
The notch in the socket can also be seen, which will correspond to the notches in the chips.
In this picture, the old chip, socket and the new
eTune chip
are all facing the correct way.
Align the new chip with the holes in the socket and press down firmly. If you are doing this inside an opened Twin Board
ECU, pay extra attention to this step, and look closely to make sure you haven't jumped a hole in the socket, or have a
leg outside of the hole.
You are now ready to reassemble the ECU, by first fitting the anti vibration clip, sliding the top board (if removed)
back into position, and snapping all stand offs and rivets into position.
Replace the top protection board if fitted, and you can then replace the top cover, gently bending the aluminium
tabs back into position, and refitting the T20 Torx screws.
You can now refit this into your vehicle and use it straight away. You may find the idle will be a little rough
in some cases, but this will only be temporary, and the vehicle can be used as normal without any need for specific
driving styles or break-in period.
Other ECUs will follow a similar format. The
0261 200 174, as used in E30s is pictured below.
On this ECU, you just need to bend back the 10 tabs to remove the cover. 2 are hidden in this picture behind
the black foam.
This will reveal the now familiar plastic chip carrier with the original Eprom fitted underneath.
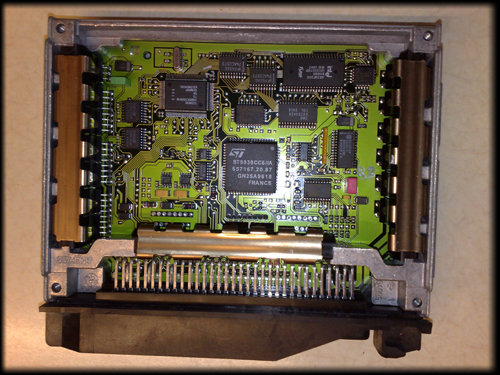
Above is pictured a Siemens MS41 ECU. This ECU uses a
Flash chip. The Flash chip is the large
rectangular chip in the top right. These Flash chips can be erased and reprogrammed from the diagnostic port, so do
not need to be replaced. These ECUs, which were used from around 1996 onwards will require a
remap
to load the new
eTuned program. Take a look at our
Remaps page
for further information on obtaining an eTune Remap.
 This guide will show you how to fit an eTune chip into your ECU.
EndTuning uses newer, faster chips to replace the previously installed Eprom.
Data access times is on average 4 times faster with the newer Eproms, providing the new tuned information needed
to the processor quicker.
This guide will show you how to fit an eTune chip into your ECU.
EndTuning uses newer, faster chips to replace the previously installed Eprom.
Data access times is on average 4 times faster with the newer Eproms, providing the new tuned information needed
to the processor quicker.